Showing posts with label baking. Show all posts

Thursday, June 20, 2013

"Enchiquitos"


One of my favorite recipes to make and eat is one I like to call "Enchiquitos". I adapted the recipe from one I found online nearly a year ago. I wrote down my changes, but didn't hang on to the original recipe, so I'm unable to give credit. These could be compared to the newly popular "baked taquitos" that are floating around the internet, but I surely prefer the name Enchiquitos. It's more fun to say and they are more of a combination of enchiladas and taquitos in my opinion.


Ben loves it when I make these...and honestly so do I. They are perfectly crispy on the outside but creamy and flavorful on the inside. I always try to make enough for him to have the leftovers for lunch the next day, he's told me that he's envied by co-workers on those days...which makes me very happy.

So, on with the details shall we?

Enchiquitos
Ingredients
1/3 Cup (3 oz.) Cream Cheese
1/4 Cup salsa
1 Tbs. lime juice
1/2 tsp. cumin
1/4 tsp. garlic powder
1/4 C chopped onion OR 2 Tbs. sliced green onion
2 Cups shredded cooked chicken (I cook up a frozen chicken breast in the oven a few hours prior)
1 Cup grated cheddar cheese
4-6 large flour tortillas
olive oil cooking spray
coarse salt

Preheat oven to 425 degrees. Prepare your bakeware by spraying generously with the olive oil cooking spray. Keep it handy, you'll need the spray again later. I use a 9x13 dish most often, but these can be baked on a cookie sheet.

First, heat the cream cheese in a microwave safe dish for 20-30 seconds to soften. If you have a pretty powerful microwave, try in 10 second increments. Mine's on the older side so I can go longer before making a splattery mess of things.

In a medium bowl combine the softened cream cheese with the salsa, lime juice (I use fresh squeezed), cumin, and garlic powder. Mix well. Next add the onion, chicken, and grated cheese. Combine well.

I prefer these with green onions, I really like green onions. I almost always have them around in a dish in my freezer. If you prefer white, yellow, or even red onions- take your pick or combine if you REALLY like onions.

Next, place about 3 Tablespoons of the mixture in the middle of a large tortilla. If you are using a baking dish you can make fewer enchiquitos and stuff them fuller, but I wouldn't recommend that if you are baking on a cookie sheet as the mixture will ooze out the ends while baking.


Spread the mixture out a bit and roll the tortilla tightly around it. Place it seam side down on your well oiled bakeware. Repeat until the dish is full, or you're out of mix. If you bake in a 9x13 dish and they are touching, the sides will be soft but the top and ends will be crisp. If you lay them out on a large cookie sheet with spaces between each one, they will be crispy all over- more like a taquito. I prefer to make them in a dish- enchilada style.


Spray the tops with your olive oil spray and sprinkle with the course salt. Bake (uncovered) in your preheated oven at 425 degrees for 15-20 minutes, or until the tops are crisp and the ends begin to brown. Note that they will be done quicker if you chose to use a cookie sheet instead of a baking dish.

Be very careful before eating as they will be VERY hot inside. I've been too eager on more than one occasion and suffered a burned mouth...it was worth it.

Serve with a side of sour cream and enjoy.


What's your favorite hybrid recipe? What's your go-to meal? I used to make a cheesy-chicken and rice casserole whenever a friend or family member had a new baby or was ill. Now I make Enchiquitos!

And, if you're in need of a way to reorganize your best recipes, check out Blurb Books cookbook options! We used Blurb to make our wedding album and I absolutely loved their book editor. It turned out beautifully, I would love to make a cookbook some day!




Wednesday, November 23, 2011

Thanksgiving Baking

It's been a bit crazy around here. I've been catching up on laundry and other household chores. Our house is coming back together quite nicely, it feels good. But now that my kitchen is clean, I'm ready to bake for Thanksgiving (which means I'll have much more cleaning to do all over again).

I just wanted to pop in real quick and share what I'll be making for tomorrow's dinners. Yes, dinners, plural. We have two every year, the joys of having most of our family in the same town. It's really exhausting, but totally worth it to get to see everyone. All of Ben's extended family and some of mine will be meeting Desmond for the first time.

Last year I made pumpkin rolls, which are really yummy but fairly time consuming. So this year I'm cutting corners a bit and making pumpkin bars with cream cheese frosting, adapted from this recipe.

What do you make/bring for Thanksgiving dinner?


P.S. don't forget to enter my current giveaway for a $20 credit to The Sunshine Stitch, ending Friday night. There's something for everyone on your shopping list!

Wednesday, May 25, 2011

blustery spring

Oregon's blustery spring weather has returned. We've been spoiled the last week or so with clear skies and temperatures in the 70's. I may be the only one welcoming the rain. Less work for me to do in the yard and another reason to stay inside. I've been trying to get stuff done in and around the house but the sunshine makes it hard to stay inside. I've also been wanting to do some baking but who wants to mix, measure, + pour in a hot kitchen on a hot day?

So it's very windy and wet out today. I ran some errands + went in to the church offices this morning. I think I'll join Kai for nap time in a few (hoping to sleep off a headache). Then I'm going to bake this, or maybe try some of these. Afterwards I may fold some laundry or just read books + color with my boy.

What do you like to do on the blustery days?


P.S. Don't forget to enter my current giveaway here and vote in our poll in the upper left column. We find out the sex of our new baby tomorrow morning!

Thursday, January 27, 2011

pizza turned calzone: a whoops dinner

I have been meaning to prepare a homemade pizza for dinner for weeks now. Every time I remember, it's too late to give the dough adequate time to rise. Somehow Tuesday afternoon I remembered and all of the pieces fell together for me to get things done in time for dinner...at first.

I followed this recipe for the dough, except I only let mine rise once and it was plenty. Not sure why this recipe calls for twice. I was able to mix the dough and get it ready while Malakai played in his crib just after happily waking from a 3 hour nap. I then let it rise while we played and cleaned up the house a little bit.


For the sauce, I just sauteed 2 teaspoons or so of minced garlic with a little red onion. Then let it simmer with a can of plain ol' tomato sauce. I had a 15 ounce can and probably used about 12 ounces, but easily could have used less.

Next I shredded about 8 ounces of mozzarella cheese. I then took the raised dough and tore off a small chunk for a mini pizza for Malakai. It turned out fairly thick, but on my Pampered Chef baking stone it only took about 10 minutes to bake all the way through. This little cheese pizza turned out great, and it was so cute.


Speaking of the pizza stone, I had only used it once and it was over a year ago. I wasn't quite sure how to use it so I read up a bit online. I read that it should be seasoned with olive oil and be in the oven while it's preheating to 425 or so. I followed those directions and ended up with a house full of smoke from the oil.

whoops.

In preparation for the next pizza I got out the corn meal to keep the dough from sticking to the cutting board or pan. Except what I had purchased was corn starch.

whoops.

So I sprinkled flour instead, which is what the directions on the above recipe calls for anyway. I then rolled out the rest of the dough, added the remaining sauce and mozzarella as well as a sprinkling of parmesan + romano cheeses. Then I doled out the pre-sliced pieces of pepperoni.

{see how nicely everything seems to be coming together?}

I was nervous about transferring the pizza from my wooden cutting board to the hot baking stone in the oven, and rightfully so. It turns out the dough had stuck to the board. As I tried to pick it up, I was worried about making a hole in it, but there already was one despite how thick I had rolled it out.

whoops.

Ben + I went back and forth about what to do. I tried picking it up with two spatulas, then using both hands, all while Ben was holding the cutting board over the open oven. We were both trying to figure it out while stifling laughter. I was simultaneously about to laugh + cry. I didn't know what to do.

Next,  I tried flouring a thin plastic cutting mat and sliding it underneath the raw pizza. I got it about halfway and it wouldn't go any further. I told Ben that we were either having uncooked pizza for dinner or a giant ball of messy dough + cheese. Then, I realized...that's kind of what a calzone is.

I decided to fold the pizza in half in one last ditch effort to save our meal (and quickly because Ben had to be out the door for worship practice in 30 minutes). I was able to fold it over, quite messily, but it worked. Then I scooped up the dough with both hands while Ben held the cutting board over the oven and I quickly dropped it on.

SUCCESS! So far.

{this picture exhibits all of my feelings in that moment}

{Ben thought it necessary to take a photo of the weirdness as it baked}

I set a timer for 15 minutes and quickly googled how to bake a calzone. It turns out they're supposed to bake at a slightly lower temperature, so I switched it down to 400 and watched carefully. I took it out around 12 minutes or so. It was cooked all the way through!

Since my original plan hadn't been to make a calzone, I had way too much meat and cheese in the middle. I also hadn't sealed the edges properly, so when I cut it  the cheese + sauce came flowing out.


whoops.

Meanwhile, Malakai is chomping away at his perfect little pizza and I'm wishing I would have just made a bunch of tiny pizzas and avoided this issue altogether. That, or used more flour.


When Ben + I finally sat down to eat we were pleasantly surprised. As messy as the whole thing was, and as disappointed as I was that it didn't turn out as planned, it was VERY good!

What kitchen bloopers have you experienced lately?

Wednesday, November 24, 2010

another dessert recipe

I think it's a little funny that almost all of my posts about cooking have to do with desserts. I don't usually make anything worth sharing for dinner. Except this soup I just discovered, but I didn't actually "make" it. Anyway, it's awesome- go buy it. But first, keep reading about these cookies I made...

On Friday night Malakai was still recovering from an upset stomach that we are now thinking came from him trying curry (not hot) for the first time. Poor kiddo. He went to bed early, so Ben + I were trying to figure out what to watch on Netflix.

Meanwhile, I had a mad craving for chocolate but only had some milk chocolate chips I had just grabbed at the grocery store. So, of course I busted into those. While I was eating them I discovered a recipe on the bag. One that was quick + easy and I had all the ingredients for. I decided to do some last minute night time baking to satisfy my sweet tooth. Ben even helped me make them, which I believe was the first time he's ever baked with me.

They're called shortbread rounds and they are teensie bite-sized little goodies. We learned quickly that they are very addicting.

Here's the recipe:

  • 1 cup butter, softened. 
  • 1/4 cup sugar
  • 2 cups unsifted flour
  • 1 cup milk chocolate chips (we used the Guittard ones, they're nice + fat)
Only 4 ingredients, I count that as awesome! Especially when working in my mini-sized kitchen. 

Since my decision to bake them was last minute, the butter was straight out of the fridge. So I put it on the oven racks while it was preheating, like I did with the cream cheese for my pumpkin rolls. Unfortunately this time, I got side tracked and they melted quite a bit and made a terrible mess in my oven (that might still be there). Ben said it smelled like pancakes. It could have been worse. 

I put all 4 sticks of butter in my mixer and the realized that 4 sticks is 2 cups  and I was certainly not trying to double the recipe. So I threw the extras in a tupperware container for later, but not too much later. Perhaps baking at the end of the day is not a good task for my tired brain to take on. 

Anyway, you beat the sugar with the butter with an electric mixer. Then you slowly add in the flour until blended. The dough should be a bit crumbly. Next add in the chocolate chips and mix by hand. 

{ridiculously wonderful dough to chocolate chip ratio}

Then, using the palm of your hands roll well rounded teaspoonfuls of the dough in to 1 inch balls. ( I flattened the first batch because I didn't know what the heck I was doing). Place on an ungreased cookie sheet and bake for 13-15 minutes at 350 degrees. I always set my timer to the lowest time when I'm baking so if I can't get to them right away I have time time before anything gets burnt. 


I made these cookies again today (I put that extra butter to good use quickly!) and I wanted to try other types of chocolate chips. I happened to have dark chocolate, mint, and white chocolate in addition to the milk chocolate. So instead of mixing up a cup into the dough, I scooped the dough into the palm of my hand, smooshed the chips into it and then rolled them up in the middle to make a variety of flavor combinations. 


Let the cookies stand for 2 minutes before removing from the sheet. You can opt to dust them with powdered sugar. We did some with + some without and preferred without. 


{then try your hardest not to consume them like popcorn}

Super quick, very easy, and totally yummy little treat. 

Enjoy!


Tuesday, October 26, 2010

the adventures in baking continue


At our housewarming we received a lovely + very thoughtful gift from my friend Krista + her new husband Matt. A fun kitchen towel and these little lovelies:


In addition there was a recipe for Chocolate Cream Cheese Cupcakes on the back of the package. I had an extra package of brownie mix, so instead of getting fully in to the swing of things after burning myself out on baking, I used a box mix for the cupcakes themselves. I also happened to have an extra package of cream cheese that I didn't need for the pumpkin rolls so I made the filling to go on top of the brownie cupcakes. Yay for an experiment!

I rarely do things by the book in the kitchen, mostly because I'm making due with what I have. It usually turns out well. In this case, I had the ingredients to make the cupcakes from scratch, but I wanted to have brownies and I wanted it to be easier + faster. 

I wanted to get started right away, but the recipe called for softened cream cheese...so I improvised.


I didn't find any better advice beyond "wait 15 minutes or more" to softening it quickly. So I popped it in the preheating oven while I gathered ingredients, which took about 5 minutes, and it was perfectly soft but not runny. 

I mixed the box of brownie mix with oil, water, + eggs. Boring, easy, and kind of cheating. Then I poured the batter into these adorable little silicone cupcake liners. There's even a shaded line to guide you in how much to fill them. awesome.

Then I whipped up the easy cream cheese filling:


1 (8oz) package cream cheese, softened
1 egg
1/2 C. sugar
1/4 tsp. salt
1 C. chocolate chips (I didn't add these)
24 strawberreis ( I didn't do this either)


Beat together cream cheese, egg, sugar, and salt until light and fluffy. Drop a heaping teaspoonful of the cream cheese mix into each cupcake. Bake for 25 minutes. Allow to cool. 


I had to bake them for longer to get them to bake through since it was brownies instead of cake, maybe 35 minutes. I also had a bit of an overflow mishap with one of them. Last, but certainly not the least of my problems was that I didn't realize you have to "season" silicone by using oil on them the first couple of times. All my brownies were stuck and unfortunately I made them to bring to dinner with some friends of ours. So we just ate them with utensils right out of the liner. It was worth it. So yummy!


{mmmmmm}


P.S. don't forget to check out my new About Us page and my husband's new blog. 

Wednesday, October 20, 2010

back to baking {2 new recipes}

After an eventful weekend and a restful start to my week, I'm back in the kitchen (literally, I'm typing this post from my teensy little cooking space). I'm baking something fun + slightly new that I'll post about at a later date.

But here's all the baking I did last week in preparation for our housewarming guests.

Banana-Carrot Bread.
I got this recipe from a friend of ours who brought this delightful treat over along with a pasta dinner just after Malakai was born. Bless her (and all the other kind people who cooked for us that first couple weeks). I used wheat flour + coconut oil instead of "salad oil". It was while making this that I discovered a deep loathing for "finely" grating carrots (this was soon replaced by my loathing for scrubbing tile floors).


Brownie Cupcakes with Peanut Butter Creme frosting.
I've made these before. I also served some with plain ol' store bought vanilla frosting. Also, yummy.

Pumpkin Roll
A friend from college made this yummy treat one fall. I can't remember the occasion (small group?) but I remembered loving it. I made two of them and had borrowed my mom's "jelly roll" pan. Since you use wax paper (or parchment) I think it could work with a regular flat cookie sheet as well. I also used 1 batch of frosting for 2 rolls as some advice online said a whole batch would ooze out the sides. So glad I made two of these, it was the most popular thing on the table.

{my first experience rolling cake in a towel}

I had ample amounts of canned pumpkin leftover, so I froze it until I figure out what to make with it next.

*edit: I forgot to mention that I left the nuts out of my recipe. We don't much like nuts in baked goods around here.

I was also going to prepare some parmesan biscuit bites ala The Pioneer Woman, but ran out of time. So to offset all the sweets I put out chips and salsa (which was largely ignored).

This is what my kitchen looked like after all the baking...although a little warped from the panorama mode, you get the gist.

{mess.}

Sadly I didn't get a good picture after the scrubbing + cleaning and now the plates fell off the wall (again) and it's a mess from my current baking project. Some day soon I'll do a tour of our home post, another motivator to get it cleaned up again.


Tuesday, October 5, 2010

Challah

Last week I was flipping through a cookbook I received at a White Elephant gift exchanged about 3 years ago, for the first time ever. It's called A Taste of Oregon and I was hoping to find something new to bake. When I stumbled across the Challah bread and realized I had all of the ingredients, I knew I had to try it.


Ben + I first had Challah bread when we lived near the University of Oregon and had walked down to a local natural foods market called Sundance. I grew up going there with my grandpa, who had lived in the home we were then renting from my parents. We really enjoyed it, so I thought I'd try recreating this bread on my own.


The ingredients:

2 packages dry yeast (approx. 4 1/2 teaspoons)
1/2 cup very warm water
2 Tablespoons granulated sugar
6 Tablespoons oil
1 1/2 cups warm water
3 eggs
2 teaspoons salt
7 cups all purpose flour
1 Tablespoon cold water
poppy seeds (optional)

I halved the recipe because I only had 2 eggs instead of the 3 it calls for, which worked out to 2 loaves instead of the 3 the recipe usually yields. I have a feeling that it would have made 3 very large loaves of bread! I'll explain the recipe with the full amount of ingredients though.

I started the first round of mixing up the dough to let it rise while Malakai napped.

Dissolve yeast in 1/2 cup very warm water, stirring in sugar to speed the yeast reaction. Let stand until bubbly. I wasn't sure what "bubbly" would look like because this was my first time working with yeast {crazy, right?} but I'd liken it to seafoam. haha.

Pour oil and 1 1/2 cups water into a large bowl. Add eggs, reserving 1 yolk for the top of the bread. Add salt also, mix well.

Add yeast mixture to the oil mixture. Stir in 4 cups of flour, then 3 more cups. Turn out onto a floured board and knead until smooth + elastic, about 5 minutes.


I hate this part...I've never enjoyed dough sticking to my hands. This dough is super sticky. I tried adding more flour to my hands, which didn't help. I rubbed a little olive oil on hands and that did the trick. I was able to knead the dough without the frustration of half of it sticking to my fingers.

Place in a greased bowl, turning over to grease top. Cover with a cloth and let rise in a warm place until doubled in bulk, about an hour. I gave mine about 90 minutes. I used 30 minutes of this to clean up the mess I had made.


I had used a wooden cutting board to knead the dough, needless to say it was a sticky mess when I was done. I used a plastic spatula {the kind for flipping pancakes, not the rubber kind} and scraped it all off. New uses for ordinary things, love it!

Next, punch down the dough , divide into 9 pieces {I did 6 since I made a smaller amount}. Roll pieces into 8-10 inch ropes. I did this part on a dough mat that I remembered I had as I was cleaning up the wooden cutting board...convenient, right?

Braid together 3 ropes to form 1 loaf. Repeat to form the other loaves and place on cookie sheets, allowing room to double. Mix the reserved egg yoke with 1 Tablespoon cold water and brush over loaves.

This is where I had to find another new use for something else. I don't own a pastry brush, but my husband's BBQ kit he got for our wedding {which was in 2007...and he just opened it...} had this!


It was interesting to use because it has the world's longest handle. Just in case you need to brush marinade on something from across the room? I don't know... but it worked just fine. 

Next, sprinkle with poppy seeds, if desired, and set in a warm place. I didn't have poppy seeds, but I sprinkled half a loaf with coarse sea salt, just as an experiment. 

Cover lightly, to rise again, for about another hour. I set it out to do this while I left to run errands with Malakai. Errands that ended up taking 2 and a half hours. whoopsie. Luckily the bread hadn't taken over too much of my kitchen and Ben put it in the oven when he beat me home. 


Bake at 375 degrees for 45 minutes {which I think was waaay too long, I would check at 30 minutes}. Loaves should sound hollow when tapped and look lightly browned. Turn out onto racks to cool. I don't have racks...so I let them cool on the cookie sheet. They only stuck a little bit.


The pieces with salt reminded me of a pretzel, but the flaky consistency of challah is more like a croissant. I think if I had taken them out sooner they would have been perfect + moist. Not too bad for my first time baking challah...actually, my first time baking any kind of bread!

Sadly, it was pretty stale by the next day. Fortunately, I found a good tip here, that Challah makes great french toast. Unfortunately, Ben hates french toast. More for me!

If you try out this recipe, let me know how it goes!


Tuesday, September 28, 2010

Blackberry Muffins


Last week I decided to try another muffin recipe. I just like making muffins because they're handy for both Ben + I to grab on the way out in the mornings.

I happened to have some frozen blackberries that I wanted to use up, so I looked up recipes until I found one that I wanted to try. Luckily, I had just picked up a few of the ingredients the day before so I was already set.

The recipe I used was actually for blueberry muffins, but worked just fine with blackberries.

Here's the recipe

Ingredients:

  • 3 cups of all-purpose flour
  • 1 T. baking powder
  • 1/2 t. baking soda
  • 1/2 t. salt
  • 1 1/4 stick (10 T.) unsalted butter, softened
  • 1 C. sugar
  • 2 large eggs
  • 1 1/2 C. yogurt (calls for plain, I used natural vanilla)
  • 1 1/2 C. berries
  • 1 T. flour (if using defrosted berries)
Directions:
  1. Adjust the oven rack to the middle-lower part of the oven + preheat to 375 degrees F.
  2. Whisk together the flour, baking powder, baking soda, and salt. set aside
  3. In large mixing bowl, cream butter and sugar together until fluffy. Add eggs one at a time.
  4. Mix in half of the dry ingredients until incorporated. Then one third of the yogurt. Mix in half of the remaining dry ingredients, then the second third of yogurt. Beat in the remaining dry ingredients, then the remaining yogurt. Again, mix until ingredients are just incorporated. Do not overbeat.
  5. Fold in the berries. If using frozen, defrost first, drain excess liquid, then coat with a light dusting of flour before mixing in.
  6. Using a standard 12 muffin tin, coat each cup lightly with olive oil. (I used the pray version). Distribute the batter evenly among the cups.
  7. Bake until golden brown, about 25 minutes. Test with a long toothpick to make sure the center is fully baked. Cool for 5 minutes, remove from tin and serve slightly warm.
Makes 12-16 muffins.


I was so pleased with how large these turned out. They were delicious right out of the oven. However, they were a bit crumbly after a day or two, but really great heated with butter. 


Wednesday, September 22, 2010

baking in the dark

The flickering bulbs in our kitchen finally burnt out, and they just happened to do so during a very busy week. Which meant it stayed dark for 4 days or so. I made dinner a bit earlier while there was still natural light coming in the back window, and I brought in a floorlamp from another room.


Even in the dimly lit kitchen I baked brownies. And not just any brownies, but my first try at baking them from scratch. I was inspired by the recipe on the side of my container of unsweeted cocoa. I realized I had all the ingredients so I just went for it.


It wasn't too bad working by the tiny light above the kitchen sink and what was streaming in from the window in the dining room. I did have to take some of the photos in the dining room however.

Here's the recipe for these simple + delicious brownies.
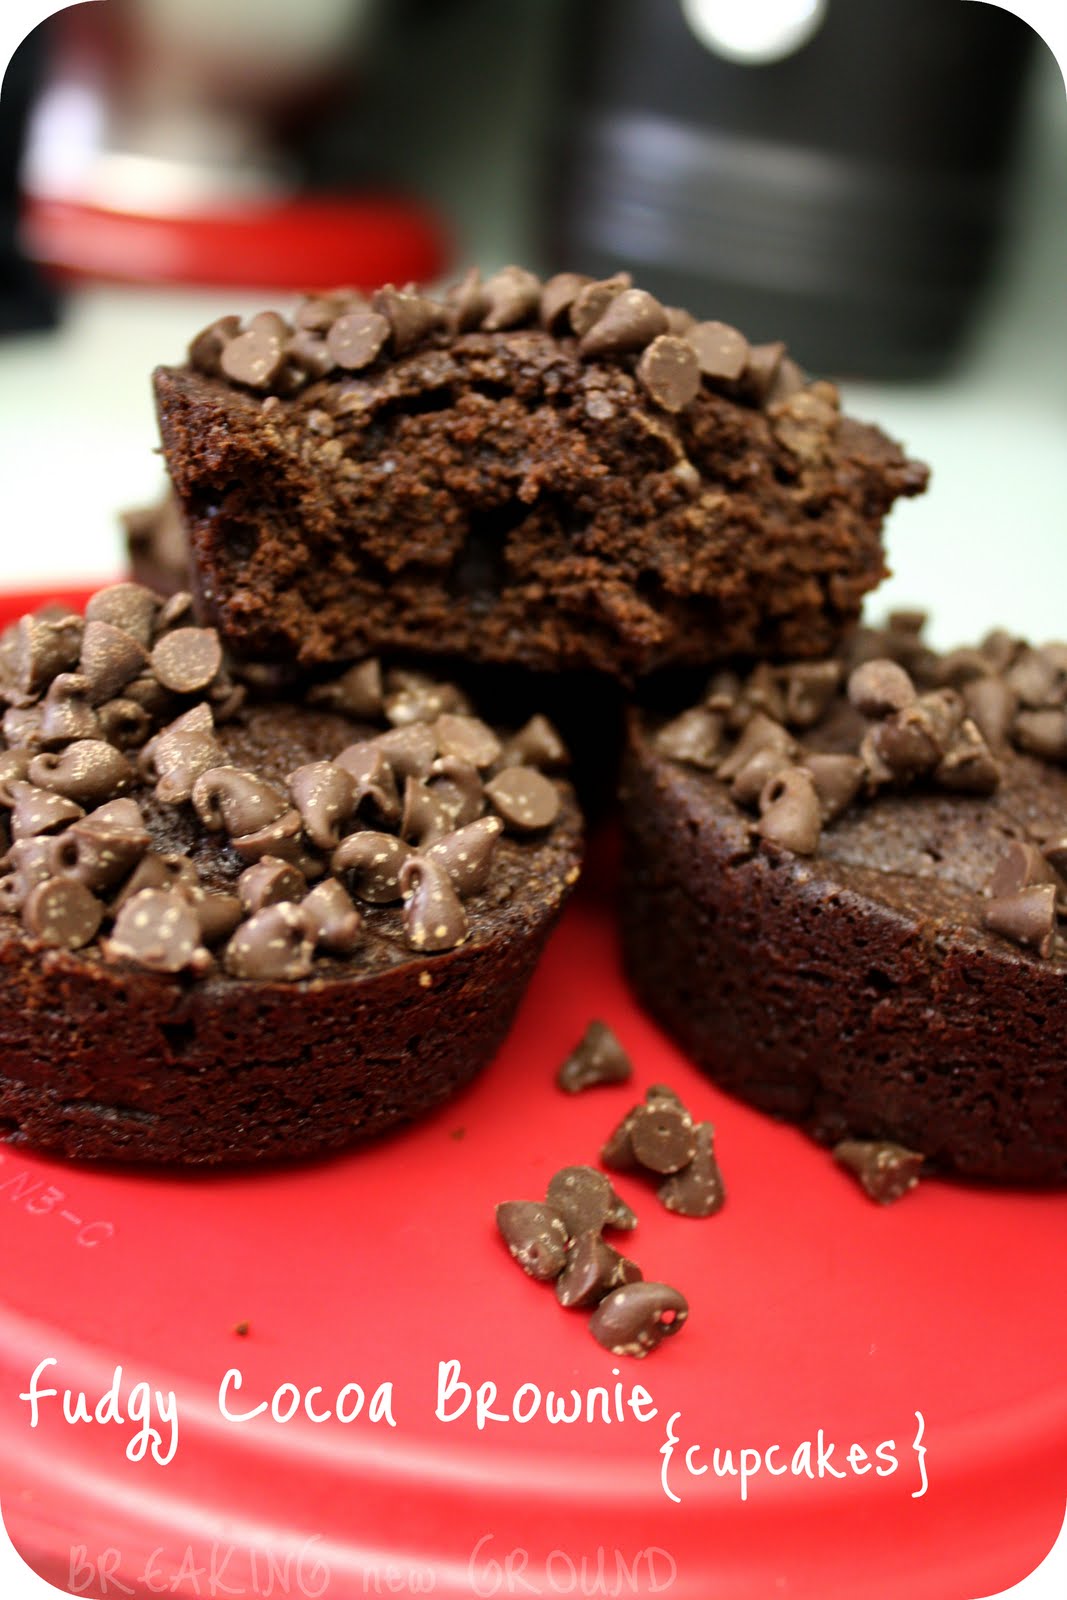
Fudgy Cocoa Brownies


  • 1/2 cup (1 stick) butter
  • 1/2 cup unsweetened cocoa
  • 1 cup sugar
  • 2 eggs
  • 1 tsp. vanilla
  • 1/2 cup all-purpose flour
  • 1/4 tsp. salt
Preheat oven to 350 degrees F. Grease an 8x8x2 in pan. In a medium saucepan melt butter (in microwave melt in 1-qt. containter). Remove melted butter from heat, add cocoa, and stir until well blended. Add sugar and mix well. Add eggs, one at a time, and beat well. Stir in vanilla, flour, and salt. Do not overbeat. Spread in prepared pan and bake 25 to 30 minutes. 


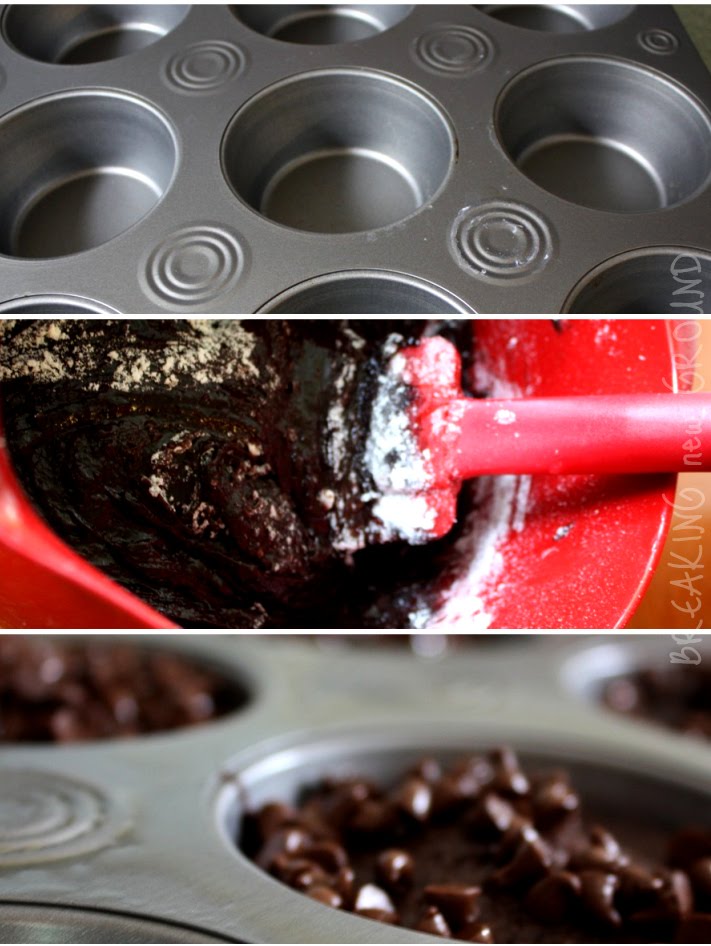
I baked them in a well oiled {olive oil spray} muffin tin. For regular cakes + brownies I usually bake for just 15-20 minutes in the tins but these needed the full 30 minutes.

While they were still hot I sprinkled some mini-chocolate chips on top. These were also delicious with our leftover homemade peanut butter creme frosting.


enjoy!

Wednesday, August 25, 2010

baking in summer

{edit: I have linked to the recipes as I meant to when I originally posted. Thanks Danielle for pointing that out!}

I don't consider myself to be a very good cook. I try and I think with experience I continue to get better. Since staying home with Malakai I've tried out new recipes for dinners here and there. Even so, I've always preferred baking. I don't know if it's because it's easier, or because I really like desserts, but I could bake all day long.

I usually don't like to turn the oven on for long during the hot summer days, making our a/c work overtime, but lately I've been baking cakes + muffins like crazy. Ever since baking Malakai's banana cake for his birthday, I've been looking into other healthy + yummy recipes.

A couple weeks ago I baked an applesauce cake. It was pretty good, but not as moist as the banana. Then I finally purchased a muffin tin {how have I not had one for so long?!} and the first thing I baked were these fudgey cupcakes. They weren't from scratch, but the frosting was! {PS I added Starbucks Coffee Liqueur to the frosting and ooooh my goodness, YUM!}

Last week I used the same banana cake recipe to make muffins. They were a bit on the dry side. However, Ben discovered that heated + topped with some butter {Brummel + Brown yogurt spread} that they were perfection for breakfast. I'm really liking recipes that use whole wheat flour.

{oh and I added mini-chocolate chips}


I just bought some more brownie mix + some white cake mix so I'll be doing some more experimenting with the muffin tin. I also want to try my mother-in-law's cocoa applesauce muffin recipe that I've had for ages. I just need to go out and get some unsweetened cocoa. I'm really excited to make them with the homemade applesauce that my good friend Jamie showed us how to make last week.

What have you been up to in the kitchen lately? Any good muffin or cupcake recipes to share?
Related Posts Plugin for WordPress, Blogger...

certified site

certified site