
This past weekend Ben + Kai played out back while I whisked Desmond away for a quick trip to the store. I wanted to get some groceries as well as some fabric as quickly as possible...so I went to the big fat Walmart because yes, they have both.
I've been meaning to reupholster my dining room chairs for at least 2 years now, ever since the cats we used to own tore up the original fabric. The desire to fix them up increased when Kai started spilling things on them after we moved him from a high chair to a booster. Now he insists on sitting in the chair without the booster and sadly this coincided with a potty training accident which left us with a ruined chair pad...so the need for new fabric (and padding!) became much more urgent.
I grabbed way too much fabric (I'm a total beginner at yardage and such) and just enough vinyl. Since I planned on using clear plastic vinyl over the fabric I just chose the cheapest version of what Ben + I both liked the most, which was a dark red. Then I asked the gal working there which weight of vinyl I should choose and she suggested the medium one. I also grabbed a small package of cotton batting to replace the ruined chair pad. It all came to about $25.
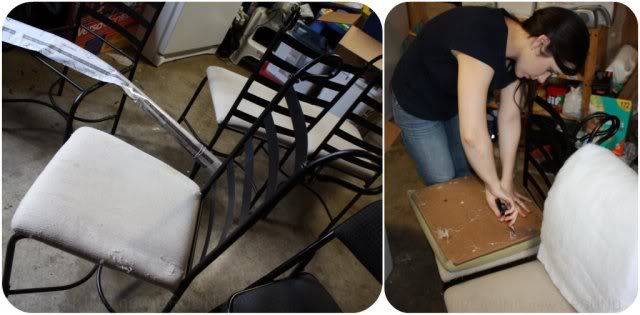
When I got home and the boys were down for nap, Ben helped me take the chairs apart. At first I planned on removing the fabric from all the pads but after how long it took for just the ruined one we decided that was far too much work and it would be fine to just cover the other 3 chairs.
Here's a little before picture of how bad the chairs looked, along with me working on taking one apart.
I had planned on taking the chair apart before going shopping to see what I was working with. That didn't happen which led to me wishing I would have purchased a foam chair pad instead of the cotton batting but I didn't want to waste precious time so I just used the whole roll to replace the one cushion.
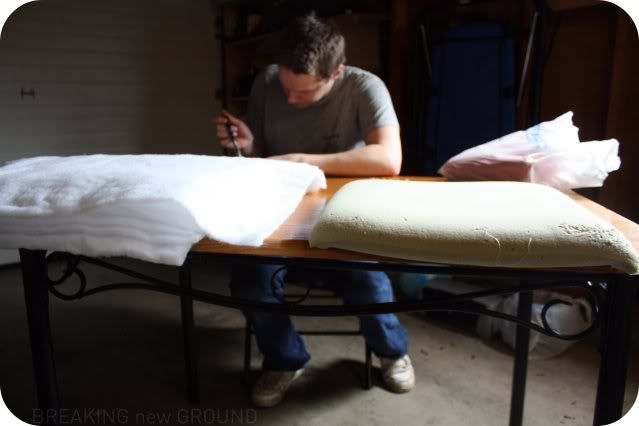
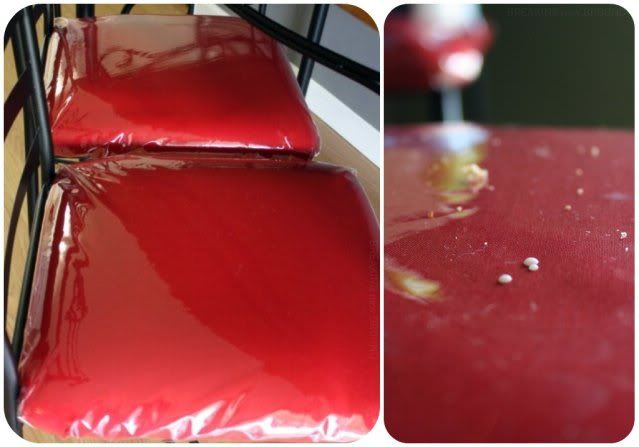
You can see the scratches from the cats on the pad to the right. We've been putting this off for FAR too long! The pad on the left is the batting I purchased which I just cut to a little bigger all the way around than the cushion, since the cushion had some overlap to go around the wooden seat of the chair.
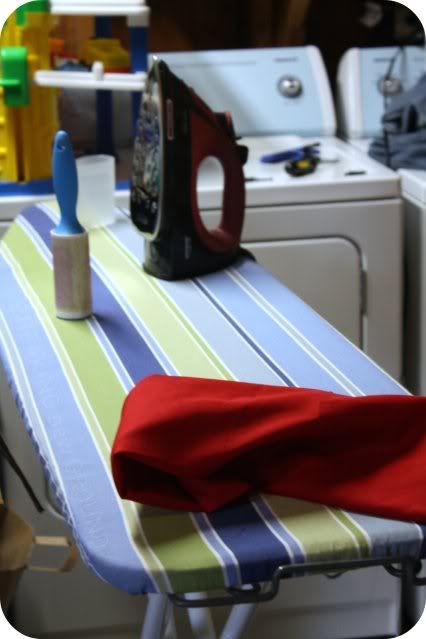
Then I used the cushions to roughly measure how big my squares of fabric + vinyl needed to be and cut. Next I ironed all 4 squares of fabric, while lamenting over having purchased far too much red fabric. Thankfully this is such a lovely color (my fave) so I'm sure I'll find other uses for it down the road. Lesson learned...and a much better one than having too little fabric.
Somewhere in here the boys woke up and Ben left me to my project. As you can see my workspace was in our garage because in our teensy house there just isn't a lot of open space, especially once the boys are up and about.
Next I just put the fabric onto the table (Ben brought the dining room table out for me to have an elevated and clean work surface), then the cushion upside down on to the fabric and began stapling like crazy. I started at the front of the chair, stapled the middle and worked my way out to the corner of each edge. I also had to use a hammer since our staple gun is light-duty and the chair seats were rather thick.
When I got all the edges done I folded the corners as nicely and tightly as possible without making the fabric pucker on the other side.
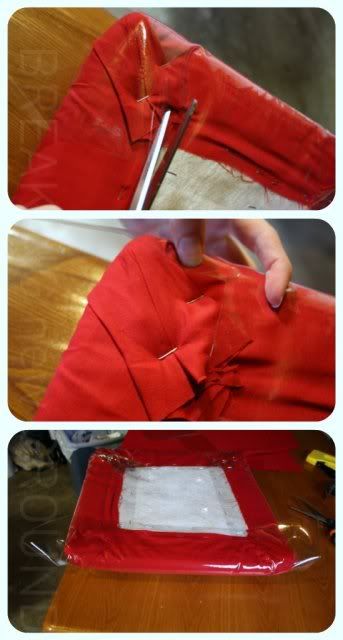
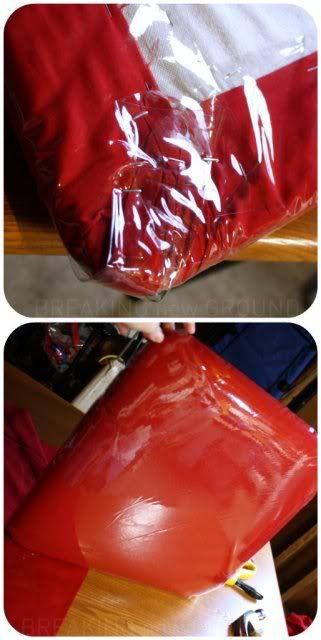
I found all sorts of help online by searching for "reupholstering dining chair seat". Reading through a couple sites helped me visualize the best way to go about the process. Next though, I could find nothing on how to cover seats in vinyl. I wasn't so sure about how to fold the corners since a sturdy plastic doesn't fold or lay as nicely as fabric. I just had to figure it out myself.
I started the same way I had with the fabric, by doing all the edges first. When I got to the corners I had to figure out what would work best. I wanted to make sure to cover evenly but not have a bulky piece of plastic. I just snipped one edge (as pictured below) so that when I folded the corner up there was one less layer of plastic to work with.
I started the same way I had with the fabric, by doing all the edges first. When I got to the corners I had to figure out what would work best. I wanted to make sure to cover evenly but not have a bulky piece of plastic. I just snipped one edge (as pictured below) so that when I folded the corner up there was one less layer of plastic to work with.
So I just kept going as I had with the fabric and stapled down all the corners by pulling tight around the edges. With the vinyl, there's a bit of space on each corner between it and the fabric, but it isn't very noticeable. Otherwise, my little technique worked! Take that internet!
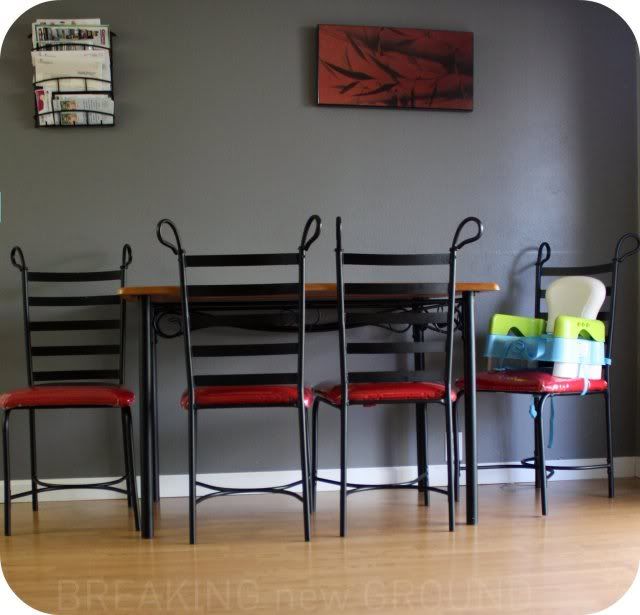
All shiny and new! Next I traded posts with Ben and hung out with the boys while he attached the seats to the frames with the original screws. After just a few hours of work (including shopping for supplies!) we had new chairs!
I just love the way they look, they now match our kitchen decor. My favorite is how the red pops against the grey wall. Actually, my MOST favorite part is how my son can spill all over these and I can just wipe them off...
At this season in our life, having wipeable furniture is a must if anything is going to last through not one, but two toddler boys! Spill away kiddos, spill away!
After I did this I also got a tip from a friend that you can reupholster/kid proof furniture by using waterproof shower curtains as your fabric. Has anyone done this or something similar to toddler-proof at home? I just love a good tip to keep things from getting ruined or having to keep the boys off of certain things. Again, with the size of our house, it's just not very doable to have much be off limits.
After I did this I also got a tip from a friend that you can reupholster/kid proof furniture by using waterproof shower curtains as your fabric. Has anyone done this or something similar to toddler-proof at home? I just love a good tip to keep things from getting ruined or having to keep the boys off of certain things. Again, with the size of our house, it's just not very doable to have much be off limits.
What's your favorite DIY?


Nice work! Love the color- must be nice checking that off of your to-do list! I have stuff that has been on my list for too long also!
ReplyDeletenice work! That was a good idea with the vinyl! My fav. DIY that I have done lately is probably the broken mirror to chalkboard!
ReplyDelete